Dyeing wool yarn in a slow cooker with food colouring

20190928_181135


In her book The Modern Natural Dyer (1), Kristine Vejar emphasises the importance of keeping baths for scouring, mordanting and dyeing at steady temperatures  suited to the dye material and the fibres being dyed.  I have often ignored this advice.  This is called “cutting off your nose to spite your face” or just downright contrary. Several well known and otherwise valuable dyes are rendered useless with high heat, eg madder. Sometimes/ at full moon I have used a thermometer.  This is painful and tedious.  I don’t do painstaking/fastidious, aka “anal” very well.

However, a friend recently cleaned out her kitchen and I was able to acquire a very good, almost new, slow cooker with the ability to sear and brown before cooking.  This meant I could retire my old slow cooker from the kitchen to the studio to be dedicated to dyeing.  I have heard that the way a slow cooker works is to keep the temperature reasonably constant at whatever setting is in use (ie, in my case, at High or Low).

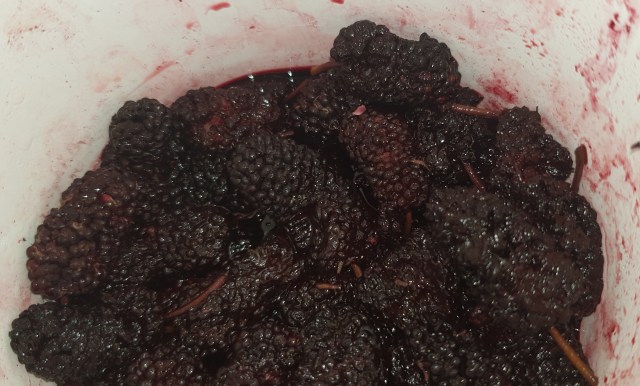
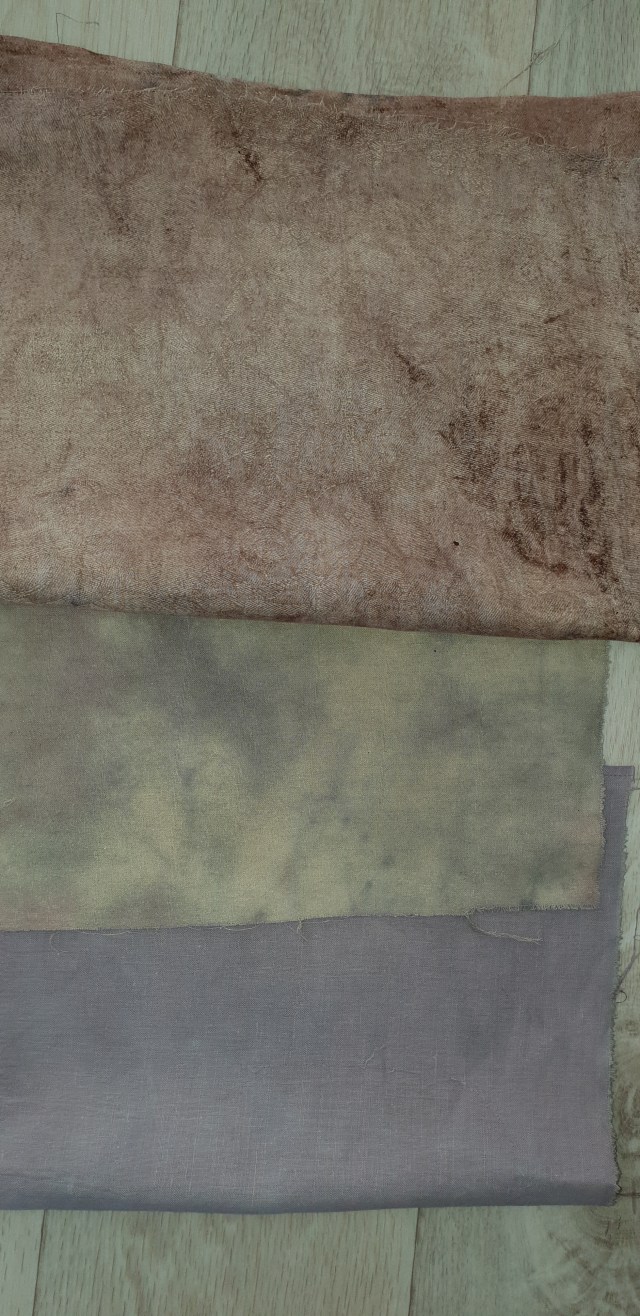
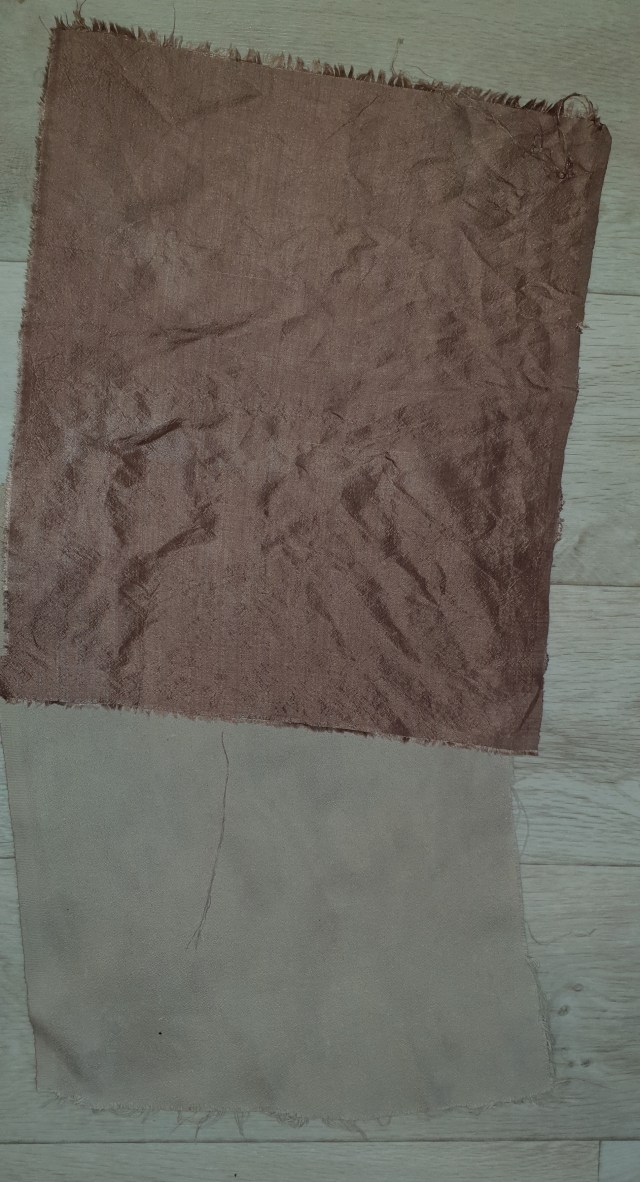
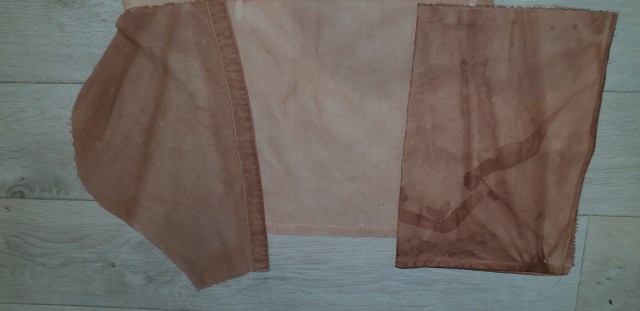
A trial suggested itself.  In another week I am, as part of a WAFTA team (2), demonstrating “natural dyeing” at the local agricultural show.  I have a lot of yarn already dyed with plants; with and without mordants; with heat and without; solar versus energy I have to pay for; etc.

“Natural dyeing” is championed in social media for a variety of reasons.  Some people erroneously advocate the use of plants for dyes as a way of avoiding the use  of chemicals.  This is silly because of course everything in the universe, including dead and living plants, contains chemicals.  Others, more sensibly, point to  desirable sustainability, which is achieved as long as the plant materials you are using are in fact harvested sustainably!

I like natural dyeing because the results appeal to my love of muted colour (not everyone’s cup of tea I know) and because it can be  a relatively safe way of dyeing (provided care is taken to research the effects and chemical content of the plants themselves and any mordants).

Thinking about what I might do this weekend to supplement my collection of solar-dyed and stove-top plant dyed yarns for the demonstration at the agricultural show, I figured safety and food would be relevant to attendees’ interests.

So…..how about trying something a “little bit fancy” (Aussie joke)?  Challenges:

.use food grade colouring and combine colours for a gradient along a skein;

.attempt to control the amount of mixing between colours so that there are crisper breaks between them rather than the more “blended” appearance you get as colours flow together when you lay one skein out and dye with various colours in a low immersion bath;

.assisted only by vinegar and heat;  and

.trial the “old” slow cooker in its new role.

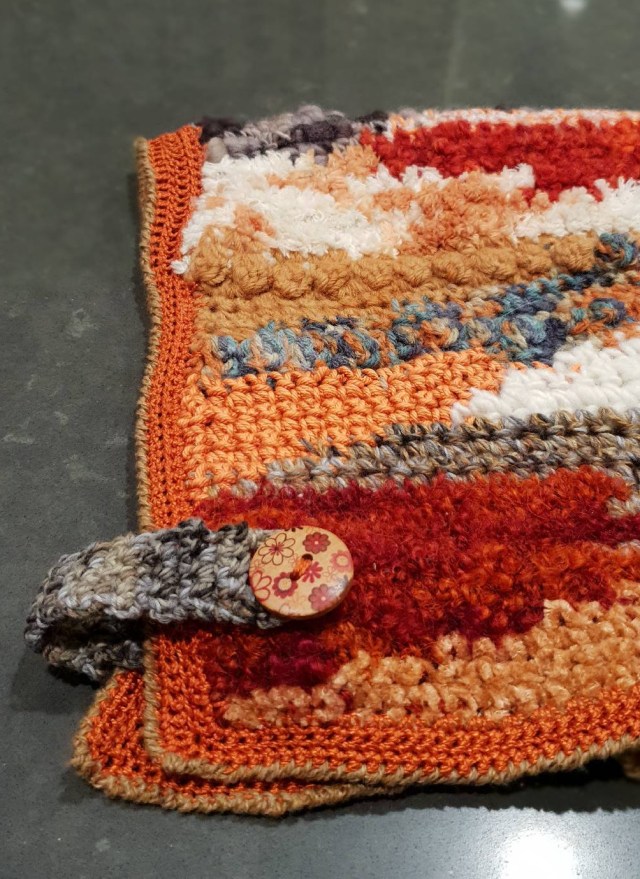
Step 1: I wound a 100g (actually weighed 105g) skein of fingering weight sock yarn  into five mini skeins each of 21g +/- 3g.

Note 1: The yarn came from Bendigo Woollen Mills and is 80% fine merino and 20% nylon.

20190928_190211

Note 2: I didn’t cut the yarn between the small skeins but left them all linked so that after dyeing I could rewind into a 100g (approx. 360 metre) skein.

Step 2: I then soaked all five of the conjoined mini skeins in cold tap water for one hour.

Step 3: Meanwhile I set up five small jars, each a slightly different shape and each having previously held about 200-300g of foods like chutney or mustard or jam.

Note 3: I was limited to somewhat squat jars, having tidied the jar stash the previous week and sent the taller ones to recycling because the squat ones look so much better when filled with chutneys and jams etc.   Duh! Five taller jars would have a) enabled me to have a higher water level in the slow cooker water bath and b) enabled me more easily to fit the five jars into the slow cooker.

Step 4: Into each jar I put half a cup of tap water at the temperature it was when it emerged from the cold tap.

Step 5: I then added differing combinations of two different food colourings to each jar.

20190928_175739

Jar #1 contained  1tsp of liquid blue food colouring (Maharajah Brand Brilliant Blue No. 133).

Jar #2 contained  3/4 tsp of blue and 1/4 tsp of pink food colourings.

Jar #3 contained half a tsp each of the blue and the pink food colourings.

Jar #4 contained  1/4 tsp of blue and 3/4 tsp of pink.

Jar #5 contained 1 tsp of liquid pink food colouring (Maharajah Brand Erythrosine No. 127) described on the bottles as a rose pink.

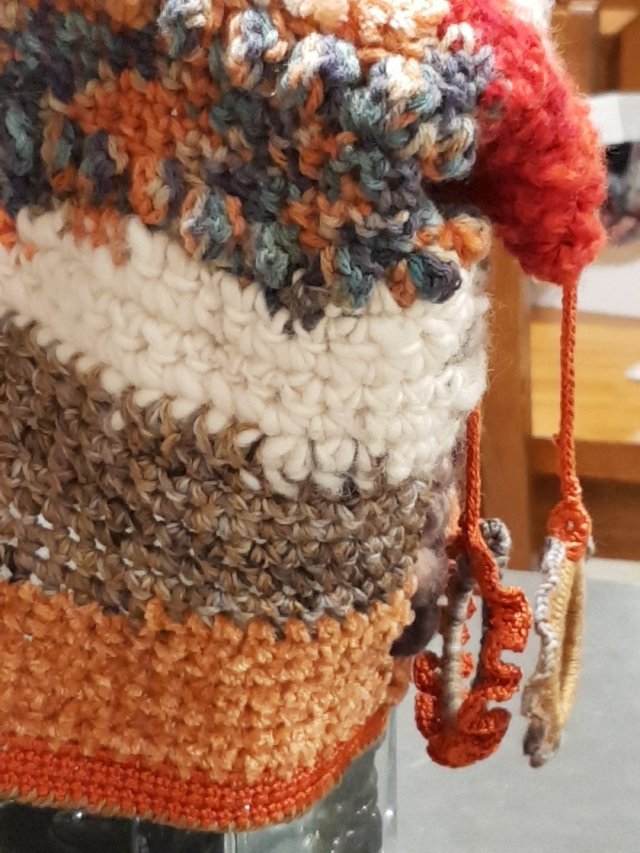
Step 6: Dipping white paper into the jars showed me that I had a pretty good and even range of colours, although there was breaking over time in Jars 2,3 and 4. I figured that my process would prevent too much breaking on the actual yarn.

20190928_175624

Step 7: Each of the pre-soaked mini skeins was immersed in a jar and poked a bit to ensure the dye was in contact with all the fibre.  I then added another one-quarter cup of water and one tsp of white vinegar to each jar and placed all of them into the  pre-heated (on Low) slow cooker.

20190929_120216

Step 8: After one hour I checked and thought they were not steaming enough.  Most of the red had disappeared into the yarn but the jars with blue seemed to still have some blue in solution.  I added another tsp of vinegar to each jar and raised the setting to High.  I left that for an hour and then turned off the heat. Cooker and contents were left to cool over night.

Step 9:  I removed the yarn from the five jars, noting that the water in each was quite clear.  Rinsing was easy with not a lot of blue left unattached to the yarn and no pink.

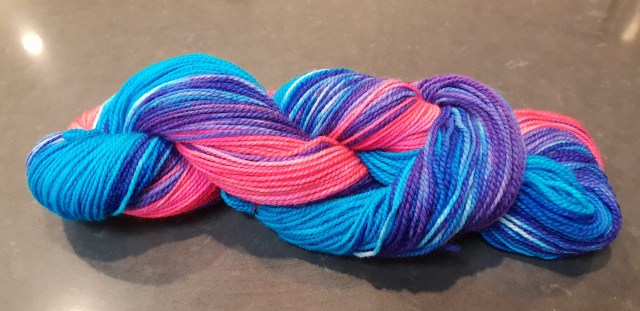
Step 10: Drying and rewinding into a skein. Et voilà!

20190930_155328


(1) Vejar, Kristine. The Modern Natural Dyer, Stewart, Tabori and Chang, New York, 2015

(2) The Western Australian Fibre and Textile Association (WAFTA) : https://www.wafta.com.au


Posted in food colours as dye, slow cooker dyeing, WAFTA | Leave a comment

Oh, What a Feeling!!

No, not Toyota***, but related.  I’m watching the first day of the Brisbane Test match Australia vs Sri Lanka.  As I start this blog the score is Sri Lanka 7/105, which partly accounts for my happiness.

In parallel, as one does in an attempt to justify sitting in front of the television for several days, I have embarked on a stash-busting project of serious dimensions. I am using as many of the reds and greys and black thick yarns as I can because I don’t have the space to keep them in and I don’t use thicker yarns much anymore.

20190124_120108

Above: Just some of the chunky and lumpy and THICK yarns I need to get rid of….

I decided on a storage basket for my project; it seems an appropriate thing to make with unwanted balls of yarn.  Win/Win?  So the other reason for happiness is that my bag cum basket is using up the yarn at a great rate.  I am definitely not used to how much fabric one can make quickly with these thick and hairy yarns! Of course, the  10.00 crochet hook is helping.  It makes quite a change from a 0.75!

20190124_115956

Above: It’s Sri Lanka’s first innings and they are 2/32 so I think I’ll keep going…

20190124_141154

Above: It’s dinner and Sri Lanka is hanging on with its toenails.  I am running out of yarn but have remembered an old suitcase that might have some grey acrylic “stuff” in it.  The dinner break will hopefully give me time to find it.

1 (5)

Above: Sri Lanka is all out for 144. Success for the Aussie bowlers.  I also had a win.  I found some yarns in an old blue suitcase that are very suitable for my project.  You know the kind; the yarns that evoke a response of “What was I thinking?” when you find them lurking….

1 (7)

Above: A detail showing a case in point: the interesting light dots amongst the red towards the top of this image were made with a sleazy yarn called “Pamela’s Popcorn”.  Did I ask myself “What was I thinking?”. Yes, I did , but now I’m sort of glad I had it.

1 (6)

By dinner on Day 2, with Australia headed (slowly) towards a reasonable lead in its first innings, I finished this basket. It  made a bit of a dent in my reds and blacks, enough to empty a very full paper carry bag of yarn into it. Its permanent spot will be in the studio which is red, white and black.  I have the yarn for more.  Do I have the will? Perhaps not as we just lost another wicket which will make us  9/304.  Well, at least I have my basket…..

Late News: Just before I press the Publish button, Australia is all out but well ahead on the first innings. Maybe my national duty is to make another one over the last three days of the Test match?

*** In Australia the Toyota car company advertises cars which will allegedly make you want to leap unnaturally highly into the air while yelling “Oh What a Feeling!” I had one once.  It didn’t work for me.

Posted in Bag, Crochet basket, Stash-busting yarn | Leave a comment

Mulberries: maximising their impact

My next door neighbour knows I like to use natural dyes.  Still, coming home in early summer to find a couple of containers of fresh mulberries on my porch was a real surprise.  I knew, however, that she didn’t intend for me to eat them! She had painstakingly harvested them from trees in the paddocks in which her horse was agisted.

I froze all of them as I didn’t have time to dye with them right then.

I suspected that there would be tricks attached to using mulberries.  Although there are plenty of tales about kids getting hideous stains on their clothes from eating mulberries in their backyards, I reckoned that it might not be that easy to get a good colour on cotton, for example. Whatever, I had some recycled/gifted cotton damask fabric which I had put through a home-made soy milk bath previously.

20181219_191947

I first took some frozen mulberries  and wrapped them into a piece of the cotton damask. The colour was a vibrant pink-purple.  I put the fabric and the berries back in the freezer for a couple of hours, then took it out of the freezer and let it sit for a couple of hours at room temperature.  Brushing the berries off , I hung the fabric on the line to dry, then washed it in Lux Flakes.

Result:

20181219_201609

Cold cotton with soy milk and raw mulberries

I then put freshly thawed berries into a pan with tap water and made a bath of mulberry dye. I placed a piece of the soy-assisted cotton damask fabric over a sieve and poured the dye bath through it, creating a bright pink area in its centre.  I hung that to dry then washed it in Lux Flakes.

Result:

20181219_201558

Cold cotton with soy milk and cooked mulberries

Finally, I put a third piece of the soy-assisted cotton damask fabric into the mulberry dye bath.

Result:

20181219_201618

Heated cotton with soy milk and cooked mulberries

In the spirit of experimentation I went further:

This time I squeezed a piece of the soy-assisted cotton damask through the lovely dark rose juice coming out of the mulberries. The fabric became a lovely bright purply pink. I then put it in a steamer basket above a mulberry dye bath.

As a sort of “control”, I put a piece of “vintage” silk fabric from a blouse donated by my sister through the same process of being squeezed through the the neat juice coming out of the mulberries. I placed that piece of fabric in the steamer too.

Finally, I put an untreated  piece of cotton/linen mix from an old apron into the mulberry bath below the steamer.  It too became a lovely purply pink.

After 40 minutes of steaming or simmering, the fabrics were removed, cooled, dried and washed in Lux Flakes.

Result:

20181213_162408

Top: Soy-mordanted damask cotton squeezed through neat raw mulberry juice and steamed; Middle: Untreated vintage silk squeezed through neat raw mulberry juice and steamed; Bottom: Untreated cotton/linen mix simmered in cooked mulberry bath.


Since all the above experiments were carried out either on untreated fabric or on soy-mordanted fabric, I resolved to test the use of a soda ash bath, thinking that the cotton in particular might benefit in terms of brightness of colour from a high pH pre-treatment.

I made up a fresh dye-bath of mulberries in tap water.  I then added:

.a largish piece of washed but untreated cotton;

.two pieces of deconstructed cotton/linen apron , one with Battenberg lace on it, which had been pre-soaked in soda ash; and

.a piece of silk from a vintage silk blouse , also soaked in soda ash.

Result:

The silk, as expected because it is a protein fibre, became a slightly darker shade than the cotton and the cotton /linen fabrics, but all were grey rather than pink of reddish, or even blue.

20181219_185003

Top and bottom left: silk in soda ash; Middle: plain and lace embellished cotton/linen in soda ash; and Bottom right: untreated cotton.  All simmered in cooked mulberry bath. 


Before washing and drying the piece of untreated cotton from above I ripped it in half, taking one half and rinsing it through a vinegar bath. Again, I was testing pH effects. It immediately went purply pink and I put it into the previous mulberry dye bath to simmer. I added a piece of dupion silk which had been washed but otherwise untreated.

Result:

The addition of vinegar seems to preserve the pink in the mulberry on silk but not on cotton. The cotton that had been treated in vinegar went a nice pink at first but reverted to grey on heating so that it was very similar to its other half.

20181219_185019

Top: Dupion silk dipped in vinegar and simmered in a mulberry bath; Bottom: cotton previously uncoordinated and simmered in a mulberry bath, dipped in vinegar and simmered again in mulberry. 

It looks as though the best results in terms of getting pink from mulberries come from silk but that interesting shades can come from dyeing cotton which has been soy-milk treated and either wrapped in raw mulberries or simmered in a cooked mulberry bath.


Posted in Dyeing with mulberries, Natural dyeing, soy milk, soy milk mordant for cellulose fibres | Leave a comment

Avocado pips and soy milk on cotton damask

I have previously used avocado pips in a high pH bath to produce pinkish colour on cotton.

This time I wanted to explore the effect of variations in dyeing conditions. The conditions  that we know affect colour are, inter alia,  time; heat; pH and mordants.

Standard throughout this study was a cotton damask tablecloth that had been mordanted in soy milk. The tablecloth was given to me by artist friend Liz Arnold (http://www.lizarnold.com.au).

The soy milk was made as described in a previous post (see note 1 below).

I made the avocado pip bath by placing  12 frozen pips in 20 cups of Perth (Western Australia) tap water.  I then added 2 tablespoons of soda ash to that bath and turned on the heat.

After 30 minutes I added two pieces of dry  soy soaked damask fabric to the bath and simmered them for 20 minutes. They were then removed, allowed to air dry and then rinsed and washed.


1 (7)

Pretty, but also pretty unexciting, not to say insipid, colour.


I hypothesised that leaving the fabric in the bath for a longer time might increase the depth of colour.  Moreover, I figured that the actual bath itself might increase in strength over time. So I added two more pieces of the same soy-mordanted damask cotton to the same bath a day later, brought it to a simmer, turned it off and allowed it to cool, then repeated this regime twice more. This took a day and a half by the time I got to the pot again but had involved minimal gas as I had turned the hotplate off each time the bath started to simmer.

The result was a much darker colour in the fabric. The master of soy milk fabric preparation (see note 2 below) tells us that soy milk cures over time.  He suggests that up to three months can be left before washing a dyed piece. I so wanted to wash my pieces!  However, I decided to wait……………………

Three days later I was over waiting. So I washed one of the two pieces of fabric, dried and ironed it. That tided me over for another week.  Then I weakened and washed the other one.


20181203_162442_001

Left: the fabric dyed on Day 1 of the avocado pip bath. Centre: the fabric dyed on Day 2 and washed after three days. Right: the fabric washed ten days after  dyeing.

It does seem that the dye bath developed its colour over time and yielded a more saturated result after a couple of days.

It is also clear that a gap of three days or ten in washing a dyed piece makes little difference to the depth of colour.  By the way, the strong marks in the fabric seem due to extra dye take up. In some cases, as with the marks at the bottom of the middle piece above, that was due to pooling around a crease.  In other cases it might be due to pre-existing stains in the former tablecloth.  They don’t worry me. In fact I like them. Since I will be using them for fabric collage the more variations and textures the better!

Ever the pseudo scientist, I then decided to use the same dye bath, now verging on elderly, to test some other hypotheses.

  1. What if I put unmordanted damask cotton in the bath?
  2. What if I put silk unmordanted fabric in the bath?

Prediction: The unmordanted damask cotton will be paler than the mordanted one. The silk will be darker than the unmordanted cotton and perhaps the same or better than the mordanted cotton.

Outcome: QED!

1 (6)

Left: a silk sleeve; Centre: unmordanted damask cotton serviette; Right: soy-mordanted damask cotton dyed over two days.

Finally, because this avocado pip bath seemed to be capable of keeping on giving, I tossed in a piece of silk from my stash and a piece of cotton sheeting.  All unmordanted.

I expected the piece of silk, albeit unmordanted, to respond well to the now mature and rich dye bath.  I was a bit disappointed so I ripped it in half, saved one piece for comparison, and re-immersed the second half for a day. The cotton sheet piece picked up a lot of colour. The second piece of silk also picked up more colour.

20181210_153834

Left: silk after first dyeing session, Centre: unmordanted cotton sheeting after one dye session, Right: silk after second dyeing session.

Overall, I am pleased that I have developed a range of cotton fabric in different rosy shades for future work as well as gaining the confidence of getting this good colour in future out of avocado pips.  Cotton is such a challenge to dye naturally without harsh things like iron.

Next challenge: some fresh mulberries a friend has left on my front porch!!!!

Note 1: (https://wordpress.com/post/mnfblog.com/3799).

Note 2: (http://johnmarshall.to/H-Soymilk.htm accessed 22 Oct 2018 and 3 Dec 2018)

Posted in dyeing with avocado pips, Natural dyeing, soy milk mordant for cellulose fibres | Leave a comment

Natural dyeing : a tongue in cheek look at the vicissitudes of a cotton sheet’s life

cotton label

Life as a cotton sheet can be fraught.  Not always of course.  The lucky ones get bought by people who use them on their beds for years.  They get to serve a very passive but important role. They mature and soften and are appreciated in a gentle way by numerous sleeping humans.

Not so for me. I am a victim of the “upsized bed” phenomenon.  That means that SHE (who shall remain nameless) decided that Queen sized was not enough.  When the King Sized bed moved in, with its accompanying sheet sets, I was lucky I suppose.  I was neatly folded and put into the back of the linen cupboard.

For a while I enjoyed the freedom of breathing fresh air (well, relatively speaking, if you imagine the cupboard was fresher than the bedroom….) and of not having my fibres stretched and polluted by the heaving of human bodies.

THEN something that is becoming increasingly common happened.  SHE got the “natural dyeing” bug. You will have heard of it.  Victims are usually members of a privileged society with every material benefit, yet they feel disconnected from “nature”. They may not be over-familiar with what “nature” is, but they know it is GOOD.

These natural dyeing converts often also feel guilt at their consumption patterns. Mind you, they don’t often eschew their purchases of Chinese or Vietnamese or Sri Lankan -made garments but they do want to make a statement.  One option is to put their bras into a (plastic) bag and mail it to China where it will somehow be used to power a city.

Another option is to create art or fashion based on  dyeing with plants on  “natural” fibres.

Natural fibres can be plant based (like cotton or linen) or animal based (like silk or wool).  Wait a minute!  What will the vegans think?  Best to stick to plant fibres, eh?

So notwithstanding the prevailing wisdom about animal fibres taking natural dyes better than those of us made of more cellulosic stuff, SHE decided to dig me out of the back of the linen cupboard.

And chop me up!

20181210_160326

I used to be a lot bigger than this……..

And boil bits of me in brews of oxalis or gum leaves or oak galls….

20181210_160646

And I used to be clean……

And put itchy bits of plants from HER garden or the local park onto me, pressing them in and screwing me up hard so there was “good”, albeit painful,  contact between these weeds and me.

20181210_161028

If you think leaves are painful, try these gumnuts!

“But wait, there’s more”, as one of those damned humans says.  I then get to be either boiled or steamed  for a couple of hours.  I can’t sensibly tell you which is better. SHE says it depends on whether iron or copper or ash or…..is involved.

img_5878

It takes a lot of rusty iron up close and personal to me to get this kind of geranium stain on me


Before I disappear entirely I want to introduce a distant family connection.  It is a sheet formerly owned by one of HER friends.  In a callous act of sheet trafficking it was passed into HER hands with malice of intent.  That is, the trafficker KNEW of the likely exploitation that would result.

20181210_160418

It’s hard to see from this photo but my fellow cotton sheet has a most distinguished set of stripes that will make it hard for sheet traffickers to disguise.


Ensuing blogs will undoubtedly feature this hapless victim *, albeit unacknowledged. Vale cotton bed sheet, originally woven for a very different purpose.

* for a taste of this sheet  exploitation, see the following result of BOILING a piece in avocado pips laced with caustic soda!!!!  Aaaaaagh!!

20181210_161038

To paraphrase Milton: “They also serve who only stand and wait”

Or should that be “.…….who only get ripped up and boiled“?


Posted in dyeing with avocado pips, Geranium leaf printing, Iron mordant, Natural dyeing | 3 Comments

Is soy milk a mordant?

Jenny Dean (1) doesn’t think so.  She says…”I am rather puzzled by the many references I have seen recently to soya milk/soymilk “mordant”as I would not describe soya milk as a mordant, rather as an assistant in certain dyeing and fabric patterning processes. In my understanding, soya milk has the same purpose in Japan as buffalo milk has on the Indian Sub-Continent – in both cases the milk solution is used as a binder or sizing agent, applied to fabric before mordanting or dyeing, in order to increase absorption and to prevent wicking and improve the sharpness of the outlines when painting or printing mordants, pigments and dyes on fabrics. Unlike a true mordant, soya milk solution does not form a chemical bond. I have never known soya milk solution to be traditionally applied to yarns rather than to fabrics and as far as I know it is not commonly used on woollen fibres.”

In the past I have tried to mordant cotton fabric with soy milk on the understanding that it somehow  makes the cellulose fibres “mimic” protein fibres, thus allowing a better bond between the fibres and the dye molecules.  The results have been unconvincing but it might be that my use of store bought soy milk is the problem.  How much soy is in supermarket soy milk?  Are there other additives in the supermarket soy milk product that are counter productive to dyeing?

A visit to the exhibition of artist Helen Coleman: Windfall-Chemistry of the Dyepot  at CASM in Mandurah, Western Australia (3), alerted me to the fact that one can make soy milk from soy beans and that this is effective in natural dyeing on cotton.

A bit of research yielded an easy recipe for soy milk by an expert, John Marshall, ( 2) and I discovered that soy beans are relatively inexpensive (A$2.99 per kilo) at my local Asian grocer.

20181102_180121.jpg

So I made some. The process is not instant but simple.  It’s just repetitive. However, one factor in this might have been that I used my Thermomix rather than a food processor.  It may be that the bowl of a food processor would offer a bigger volume so that more water could be added to the beans in one step than I could manage, thus reducing the processing iterations.

I had been gifted an old pure cotton sheet.  It was a simple matter to rip it into many rectangular pieces about 30cm x 60cm.  (Sorry sheet!)

Before I considered any dyeing, I took some of the pieces of fabric and subjected them to the time-honoured practice of flour pasting, crackling, and over-painting with acrylic paint.  I wanted to test whether over-dyeing with natural dyes would produce additional complexity in the fabric , or merely obscure the paint patterning.

For this first experiment I only dipped the fabric pieces (both the virgin and the acrylic painted ones) once, rather than soaking, removing, dipping a couple of times more then drying,  as Jenny Dean (1) recommends.  Also, although I squeezed the fabric out , there was undoubtedly an unevenness in the distribution of the soy milk across the fabric when it had dried.

This is where the pseudo-scientific method ends and the truly subjective reporting begins.

Why?  Because I forgot to include a control…..

However, I got results which convinced me on the basis of past experience that treating cotton fabric with properly prepared soy milk enhances colour take up. Mind you, Jenny Dean may be right. My colour was better than non-soy-assisted fabric results but perhaps not as good as if I had subsequently mordanted with alum.  I am still learning and I do not yet understand how one would mordant with alum without removing the soy?

Anyway, no one reads a blog that doesn’t have photos.  So here are some:

20181203_180002

Cotton, soy milk treated, covered with iron-dipped geranium, casuarina,  and eucalyptus leaves and steamed for two hours

20181203_175419

Cotton pre-treated with soy milk, steamed with purple carrot puree, then steamed with iron-soaked grevillea


20181203_175920

Cotton, pre-teated with soy milk, steamed with hibiscus (Alyogine huegeli) above a bath of acacia.

Left above: Cotton treated with flour paste, crackled, painted with rose acrylic , dried then treated with soy milk then wrapped with iron-soaked leaves, including one large rhubarb leaf.

Right  above: Cotton pre-steamed with pureed purple carrot then treated with soy milk then wrapped with iron-soaked geranium and peppermint leaves.

20181203_175945

Cotton treated with soy milk, processed  with flour paste and burnt sienna acrylic paint, dried then put in bath of acacia bark


I have concluded that pre-soaking in properly made soy milk does help enrich the dyeing results on cotton.

It also seems possible to pre-paint cotton fabric with various acrylic painting techniques and then do some natural dyeing over the top with resultant richer texture.

In future blogs I will try to show the differences between dyeing by steaming  frozen plant material; boiling fabric in “solutions” of the same material; and  wrapping and steeping fabric in thawed material over time….

(1) http://www.jennydean.co.uk/soya-milk-soymilk-solution-used-mordant/ accessed 3 Dec 2018

(2) http://johnmarshall.to/H-Soymilk.htm accessed 22 Oct 2018 and 3 Dec 2018

(3) https://www.mandurahmail.com.au/story/5622699/mandurah-creative-highlights-regions-diverse-flora-in-exhibition/ accessed on 3 Dec 2018


Posted in Natural dyeing, soy milk, soy milk mordant for cellulose fibres | 7 Comments

Stash scrap helmet [or a beanie cover]

The brief: “Mum, I’d like a sort of hat that goes over the other hats. Neutral colours please.” For fishing and camping in the Snowy Mountains.

The design points:

*keep it simple

IMG_8827

Rough sketch on scrap paper of an oblong piece that can be folded over and stitched into a hood shape. Add holes for a fastening strap.

*use stuff from the stash and choose thick yarns for warmth or at least DK weights that can be paired together as a chunkier yarn.

IMG_8829

Thick neutral coloured yarns from the stash

*use crochet rather than knit stitches because the former use about a third more metres per unit area than the latter and therefore make a denser fabric.


Knitting comparison with crochet

Top: 3m of yarn crocheted. Bottom: 3m of the same yarn knitted. No. of stitches across was the same in both pieces.


*Block it before making up

IMG_8832

It’s a bit hard to see the pins but here is the dampened oblong pinned to a polystyrene board

What actually happened:

*I ran out of neutrals and had to add some reds.  I hope it still meets with approval!

*Even with a doubling of thinner threads, I needed to add texture in those areas to add weight


IMG_8831

The basic fabric is all (English) double crochet stitches but “bobbles” are worked on the tan  area and in the variegated area above it to add weight. 

catherines-hat-of-hats-1.jpeg

A touch of jauntiness at the pointy top is probably going too far.  Instructions for removing them were included in the parcel!


catherines-hat-of-hats-2.jpeg

The helmet can be buttoned or left loose with the strap securely threaded through a button hole on the other side.

Resized_20180801_203231

Err…..perhaps a bit TOO boho?

Posted in Beanie, Clothing, Design, freeform crocheting | 2 Comments

My first KAL

A KAL is knit-world speak for “knit-along”. I discovered that only recently when one of my usual Australian on-line yarn suppliers (Yarn Glorious Yarn at https://www.yarngloriousyarn.com.au) posted one on Ravelry  (https://www.ravelry.com/groups/yarn-glorious-yarn).

The KAL was for a particular design by Amsterdam based designer Stephen West (https://westknits.com) but I decided to choose another of his designs:  Smock-It!


Knitting Smock-It image

Stephen West’s own image of “Smock-It!” from his website.

I had also only recently heard of the hand-dyed 3-ply fingering weight of merino knitting yarn produced by Brisbane indie dyer Stitch Abeille Yarns called (naturally!) Drizzle Merino Fingering.  So I decided to use that for my KAL project.

I chose three colours that would blend together in shades across the shawl, just as Stephen West had done with other yarns.  The colours’ names were Dagon, Etty Bay and Outback Quarry.  I loved the very Australian sounds of them!


Resized_20180709_160548

My three yarns

Resized_20180709_160159

The first third of the wrap in “Outback Quarry”

Resized_20180724_164610

Almost there: just needs the 600 stitch wide edging with “smocking” and picot edge


Finally, it was finished within the two months allowed for the KAL (July and August 2018.

Knitting final Smock it - 1 (1)

The light end

Knitting final Smock it - 1

The dark end

Knitting final Smock it - 1 (2)

The whole shawl

I reckon I might do another of Stephen West’s designs and use the marvellous Aussie dyed Drizzle merino yarn as well.

Posted in Clothing, Knitting, Scarf | 2 Comments

I love mistletoe

OK, I know that’s like saying I love roses.  Which roses?  Name specific species! Leaves or flowers?

Well, I don’t know more.  I harvested “mistletoe” from a forest reserve in Western Australia and used it experimentally on fabric.

Because it’s found on gum trees, its leaves look like the host species’ leaves.

IMG_8849

Mistletoe on white paper

IMG_8846

Close up of the mistletoe leaves

They have the same shape as their eucalyptus hosts but typically look redder and feel more waxy than the leaves of the gum trees they parasitise on.

I put a small number of these leaves into a cotton sheet derived bundle and brought it to the boil. I added a small skein of kid mohair to the pot and turned it down.  Later, I raise the temperature again , then turned it down.  Result: small kid mohair skein turned from white to light brown.

BUT! Over the next week, out in the winter cold the square of cotton sheet in which the mistletoe leaves were wrapped turned  lovely peach-orange colour!!!  So I tried heating the pot again, this time with some small skeins of different cotton yarns.

IMG_8837

Cotton yarns drying in the sun before washing.

The yarns did fade with rinsing but are still a very pleasing colour.

IMG_8850

Yarns and fabric after dyeing with mistletoe and after being rinsed and dried. At bottom is the kid mohair.  Top yarns and background fabric are cotton.

At some stage I will compare these outcomes with the outcomes I might get from pre-mordanting the cloth and fibres with, say, alum.  However,  to have these colours from untreated cellulose fibres,  which are notoriously more difficult to colour than silk and other protein fibres, is exciting.

Posted in Mistletoe as dye, Natural dyeing | Leave a comment

Dream Time Shawl

IMG_8841
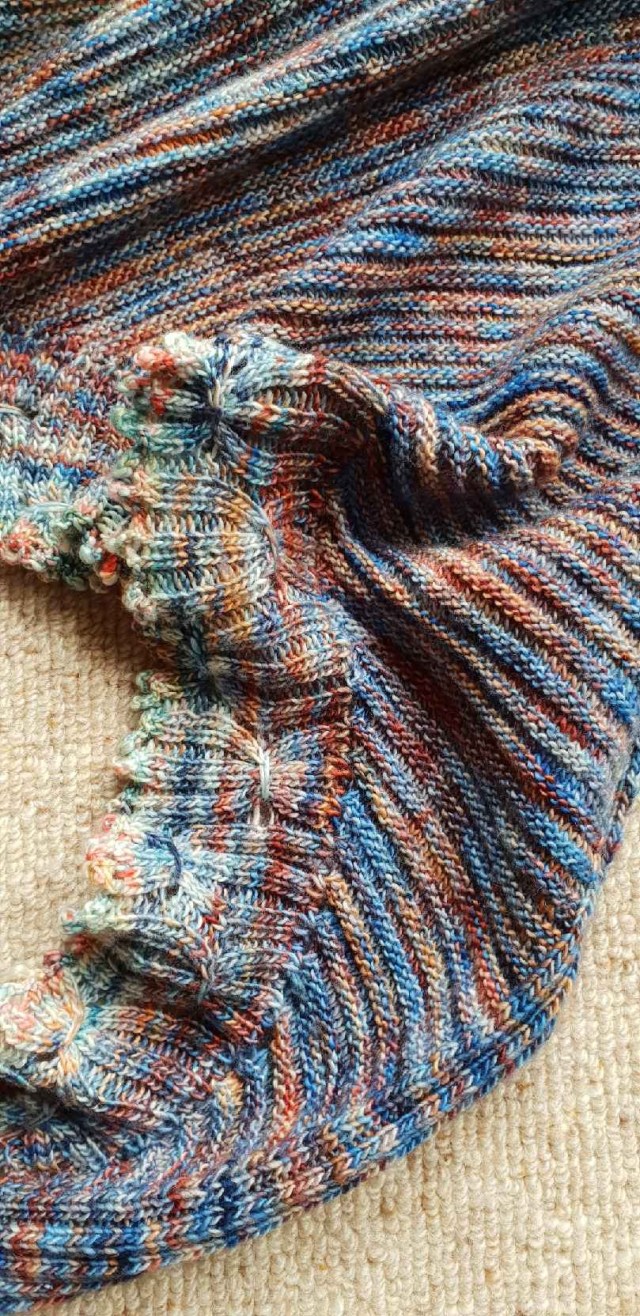
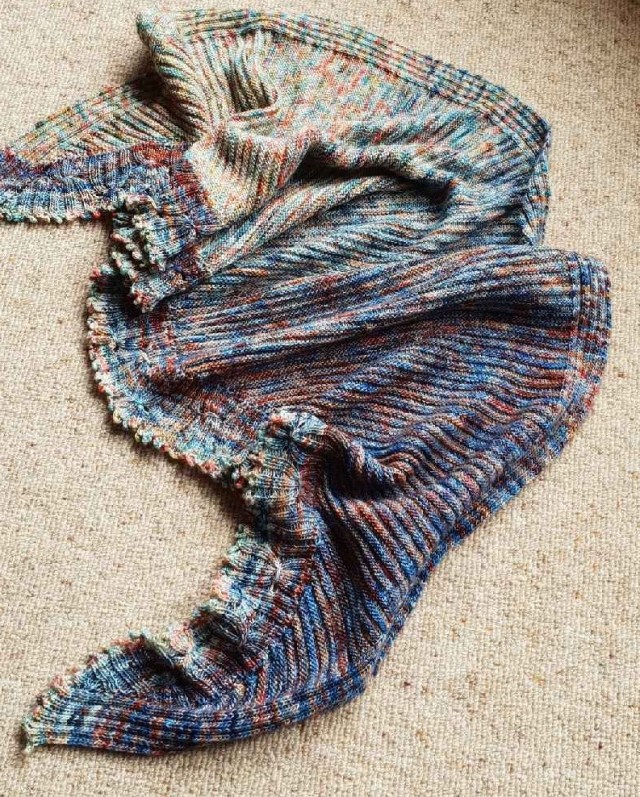
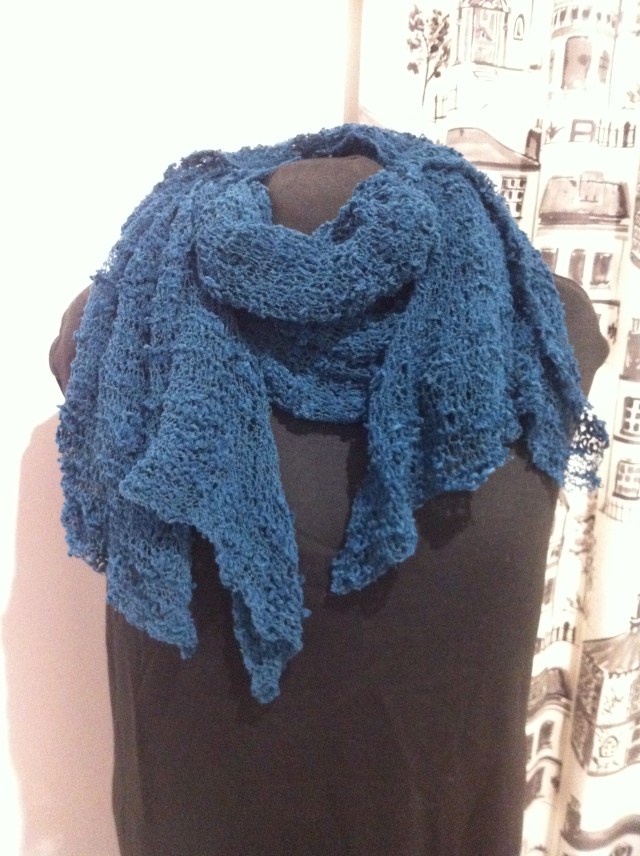
I’ve called this blog Dream Time Shawl because that’s what its designer Teresa Dair called it.

This project has been on the go (or off the boil) for several years since I bought the pattern and the yarn at the main Perth Craft Show when Dairing (www.dairing.com.au) was still coming to it from Victoria.

Knitted in garter stitch on 7.00mm needles and a cotton chenille slub (DM50x120gms), it is simply a large rectangle of approx. 2m x 70cm.

Its real attraction for me, with my leaf fetish, is that the fabric this yarn creates reminds me of scribbly gum.

Scribbly gum is a name given to a variety of different Australian Eucalyptus trees which play host to the larvae of scribbly gum moths which leave distinctive scribbly burrowing patterns on the bark.[1] Source: https://en.wikipedia.org/wiki/Scribbly_gum

Thank you Teresa for devising a “pattern” that showcases this yarn so well!

IMG_8839

The scarf held in front of my studio doors

Posted in Clothing, Knitting, Scarf | 1 Comment